
Miyuki TILA Beads
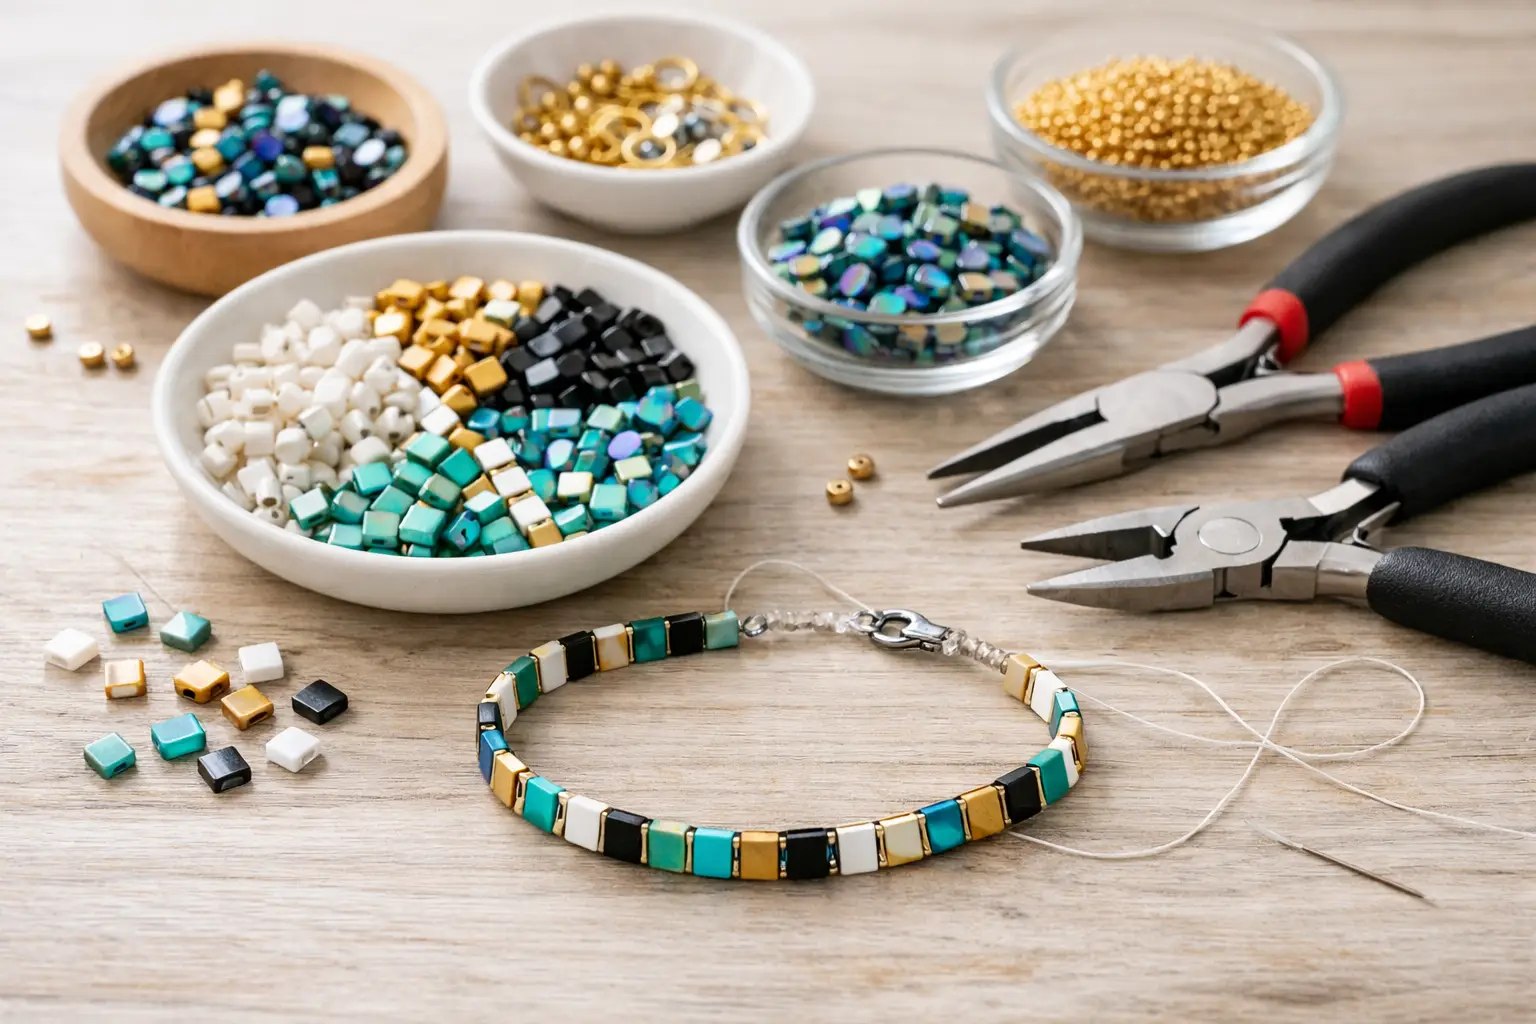
Tila beads can look deceptively simple until you start stitching with them. Their flat shape and two-hole design give brilliant structure, but they also demand cleaner thread paths and better tension than many round seed bead projects. If you are working out how to use Tila beads, the key is to treat them as architectural beads rather than fillers.
Miyuki Tila beads are precision-made glass beads with a square, tile-like profile and two parallel holes. That uniformity is the reason they sit so neatly in bracelets, cuffs, earrings and beadwoven panels. It is also why any mismatch in thread choice, spacing or hole alignment shows up quickly. Used well, Tila beads create crisp lines and repeatable results. Used casually, they can leave gaps, twisting and unnecessary thread wear.
How to use Tila beads for clean structure
The best starting point is understanding what Tila beads do differently from seed beads or round druks. Because each bead covers more surface area, a small quantity builds width and pattern quickly. Because each bead has two holes, it can stabilise a design in a way a single-hole bead cannot. That makes Tila's particularly useful when you want a bracelet or strip of beadwork to lie flat and hold its shape. The trade-off is that they are less forgiving. A slight tension imbalance can pull one side tighter than the other, and a missed hole can distort a whole row (one reason to string on Elastic) If you are used to free-form stringing, Tila's usually reward a more planned approach.
Before you begin, sort your beads and check the holes. Miyuki consistency is high, but it is still worth passing a fine beading needle through both holes as you work, especially if you are combining finishes or working from an older stash. That quick check avoids forcing thread through a partially obstructed hole later in the piece.
Choosing the right thread and needle
For most Tila beadwork, a strong braided thread such as FireLine or WildFire gives reliable structure. These threads help when you are passing through the same holes multiple times and want the finished piece to keep a firm shape. If you prefer a softer drape, KO thread, Miyuki thread or Nymo can work well, but they usually suit lighter designs better and may need more careful tension control. And of course, you can use Elastic - very popular for bracelets. We recommend the thinner Miyuki or Elonga - both in thinner sizes, as both can be threaded with a collapsible eye needle.
Selecting compatible beads
Tila beads rarely work in isolation. Most successful designs pair them with smaller beads that fill the edges, bridge gaps or soften transitions. Size 11/0 or 15/0 seed beads are often used between Tilas to create flexibility, while Delicas can sharpen the geometry if you want a more engineered finish. Round seed beads add a softer border and can help correct minor spacing differences.
This is one of the main "it-depends points" in Tila work. If you want a flat, grid-like bracelet, keep your supporting beads small and consistent. If you want more movement or a textured edge, introduce rounder accent beads and allow slightly more spacing between the Tilas.
Basic ways to use Tila beads
There are three common approaches: simple stringing, ladder-style beadwork and woven panel construction. Each has its place, and the best one depends on what you need the finished piece to do.
Simple stringing is the fastest route for beginners. You thread through one hole of each Tila to create a row, then return through the second holes to stabilise the line. This works well for straight bracelets and necklaces where the design is based on colour blocking or repeated bead sequences. The second pass is not optional if you want the beads to sit neatly. Without it, the row will twist.
Ladder-style beadwork uses both holes from the outset, with each Tila connected to the next through paired thread paths. This gives a more controlled strip and is often a better method for cuffs or bracelet centres. You can add seed beads between Tilas for spacing or keep them edge-to-edge for a more tiled look.
Woven panel construction is where Tilas really come into their own. Here, rows of Tilas are connected vertically and horizontally, often with seed beads linking the corners or edges. This creates broad beadwoven sections for bracelets, pendants and statement earrings. It takes longer to set up, but the result is stable and highly repeatable, which matters if you are making matched pieces or producing stock for sale.
Starting a simple Tila bracelet
A practical first project is a single-row bracelet. Cut a comfortable length of thread rather than starting with an overlong piece. Add a clasp component or temporary stop bead, then string your first row of Tilas through one hole only. If the beads are sitting hard against each other, add a small seed bead between each Tila. That extra space often improves flexibility and reduces the chance of the bracelet feeling rigid on the wrist.
Once the first row is the right length, work back through the second holes in the opposite direction. Keep the tension even on both sides. If one edge begins to draw in, stop and adjust before continuing. With Tila beads, small corrections made early save a lot of unpicking later.
At the ends, reinforce the turning points. These are the areas that receive the most strain when the bracelet is worn and fastened. A few extra passes through the final Tila, nearby seed beads and clasp connection usually make the finish more reliable without adding bulk.
Common problems when learning how to use Tila beads
The most frequent issue is uneven tension. One side of the beadwork sits straight while the other bows or ripples. This usually happens because the return pass through the second holes was pulled tighter than the first. The fix is not brute force. Loosen the section slightly and rebalance the thread before continuing.
The second common problem is thread abrasion. Tila holes are generally smooth, but any multi-pass design creates friction points, especially at the edges where the thread turns. If your design needs several passes through the same bead, use a thread with enough strength for the job and avoid overfilling the holes with oversized thread and needle combinations.
A third issue is spacing. Tilas can sit beautifully flush, but not every design benefits from that. In curved bracelets or projects with decorative edges, adding seed beads between or around Tilas often improves wearability. If a tiled arrangement feels too stiff, the answer is usually spacing rather than a complete redesign.
Design choices that make Tila beads easier to use
Colour placement matters more with Tilas than with many smaller beads because each bead reads as a visible block. A slight change in finish or tone has a strong effect. That makes them excellent for stripes, checks, gradients and repeated motifs, but it also means random mixes can look messy unless the palette is controlled.
Finish choice matters too. Opaque, metallic and matte Tilas all reflect light differently across that flat surface. If you are mixing them with Delicas or seed beads, check that the surrounding beads support the same visual weight. A highly reflective Tila can overpower subtle seed bead edging, while a soft matte Tila may need contrast to stop the design looking flat.
Size coordination is equally practical. Standard Tila beads, Half Tilas and Quarter Tilas can be combined to create more detailed layouts. That gives you more flexibility for shaping and pattern work, though it also increases the need to chart the design properly. If you are aiming for speed and consistency, stick to one Tila size for the base structure and use smaller beads only for joins and embellishment.
When Tila beads are the right choice
Tila beads are particularly useful when you need width without adding many rows, or when you want a clean geometric look. They suit cuff bracelets, flat components, earring drops and connectors very well. They are less suitable for highly organic, fluid designs unless you deliberately break up the structure with softer beads.
For makers selling finished jewellery, Tilas can also help with consistency. Their regular shape supports repeatable assembly and more predictable sizing. That said, precision cuts both ways. If your technique is rushed, every inconsistency will show.
A good working habit is to build a short sample section before committing to the full piece. Check drape, thread path, spacing and clasp attachment. This matters even more if you are combining Tilas with Czech multi-hole beads or other system-based components, where hole alignment and bead depth can change the feel of the finished design.
If you are learning how to use Tila beads, keep your first few projects simple and pay attention to structure rather than decoration. Once the thread path makes sense, the design options open up quickly - and that is when Tila beads become one of the most useful formats on your bead mat.