| Act Swiftie-ly and Get Making Some Friendship Bracelets This Summer! |
The mighty Taylor Swift has reached our fair shores and is now embarking on her Eras tour here in the UK. For those of you who love this very talented lady and have been lucky enough to bag yourself some tickets, you'll no doubt know all about the trend of making and swapping friendship bracelets with other Swifties at her gigs. And if you've missed out on a ticket then maybe you're holding your own Swiftie Soirée so you can get involved too?! However you're celebrating you'll want to make sure you're part of the friendship bracelet trend this Summer too.
Friendship bracelets are no new thing - although it's hard to know exactly when they became popular, some say it's as far back as ancient China, circa 481 to 211 BC. Some historians also think they originated from Central and South America, where they were invented by the indigenous people. They've certainly gone through many revivals, especially in recent history - in the 17th - 19th century it was popular to give jewellery to friends that was made of a passed loved ones hair. In post-war 70's in the USA they were given as symbols of love and of people united in peace. In the 90's they came back by way of the colourful, knotted styles, usually worn stacked up the wrist (sometimes even made by friends during school assemblies, ahem!) and now they're back in all their bright and fun glory, with sentimental words and song lyrics being the main focus of the design, thanks to Taylor Swift.
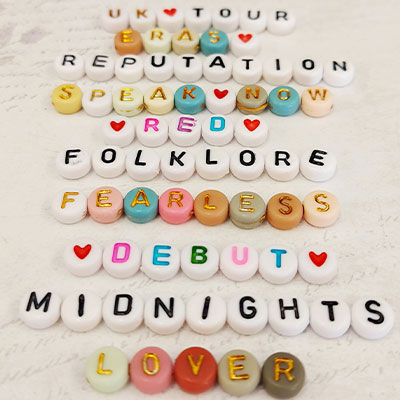
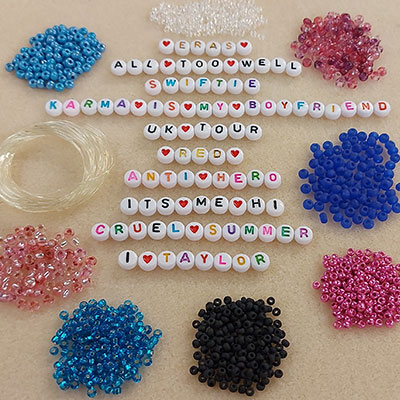
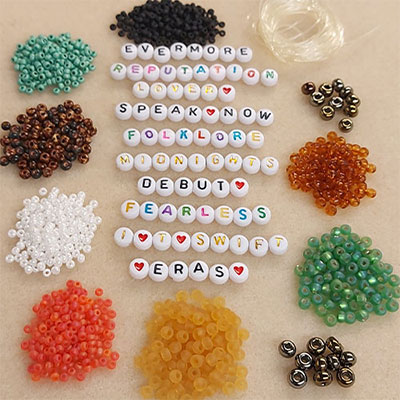
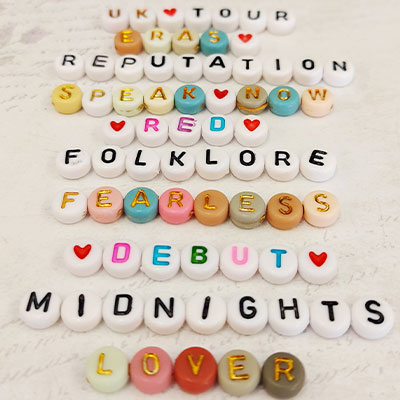
A quick Google search shows the most popular choices we've seen for Swiftie bracelets are the words Reputation, Folklore, Midnight, 1989, Debut, Fearless, Red, Speak Now, Eras, Evermore and Lover. However Swifties have been using any song titles, lyrics and even inside jokes with other Swifties to really make their own bracelets stand out and beg to be swapped and we think this is a great way to express yourself.
If you're planning to 'make the friendship bracelets' with your besties, here's some top tips to follow:
1. Work out what words or sayings you want to include, and what you will put in the place of spaces - maybe a heart bead or a lovely sparkly seed bead?
2. Pre-stretch your elastic cord a little and cut it to a long enough length to make your bracelet - remember to include enough extra for you to hold your bracelet comfortably whilst your stringing and tying your knot. As a guide, an adult's typical measurement is 7.25-7.5 inches, whereas a child's measurement is approx. 6 inches. If you're not sure you can also wrap string around your wrist and then measure that to get a more exact measurement.
3. You may find it easier to tape down one end of the elastic to stop your beads falling off as you string them.
4. It's best to string your letters first, so you know how much room you have for additional beads either side of your sentiment. Make sure all your letter beads are the right way round before stringing them onto your elastic!
5. When tying a knot, we'd suggest tying a surgeon's knot, as this kind of knot holds tightly without being too bulky. Try to place the knot next a bead with a larger hole - that way you can hide the bulky knot inside the bead hole.
6. When you then trim off the tail ends, don't trim too close to the knot as you don't want the cord to slip and untie itself. A dab of flexible clear glue can help with knot security, but avoid using nail varnish as this can become brittle or discoloured over time.
7. When you put your bracelets on and off, it is best to 'roll' them over your hand, as opposed to really stretching them over - this way they will stay nice and stretchy for longer, as well as helping to maintain the integrity of the cord and knot.
8. Make sure all your stretchy bracelets are kept away from water, body creams and lotions, sprays and other products that can damage the beads or the cord.
If videos are your thing, Beadalon have got some great instructional videos to give you some tips and tricks when using elasticated thread!
These first two videos show how you can create a simple stretchy bracelet using Elasticity - and if you don't have the special needle, that's OK as you can just string the beads directly onto the elastic as shown in the second video!
This next video is a more in-depth look at Elasticity cord, with Leslie Rogalski at Beadalon:
Ready to get making? Treat yourself to one of our Swifite ERAS Tour Kits and you'll have an armful of goodies in no time!
| Swiftie Kit 1 | Swiftie Kit 2 | Swiftie Letters Only |

