
| Miyuki Photo Converter For Delica Beads A Free Resource from Miyuki |
Sometimes you take a photo or come across an image that you think "That would make a lovely piece of beadwork" and now you can, with the help of the Miyuki free to use Photo Converter tool!
Not only will it convert an image into a pictorial chart, it will also create a word chart to follow, a list of Delica bead colours to use and the quantity needed. Plus, you'll get the option of having it as a PDF download so you can refer to it again and again, and even print it out for safe keeping.
The tool itself looks a little daunting to begin with, however it is actually very easy to use and Miyuki have produced a user guide online that you can follow HERE
You can find the Miyuki Photo Converter tool here
There are six steps to follow to make your own bead chart with an image. We've gone through each step to show you how to use the tool:
STEP ONE
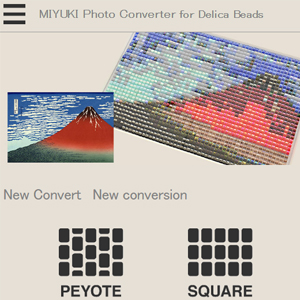
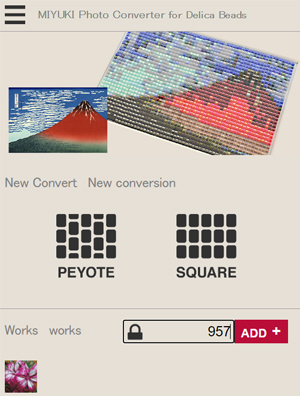
Select the type of stitch you want to use to make your design. You can choose either Peyote or Square (for Square stitch or Loom-working). For our example we chose Square. |
|
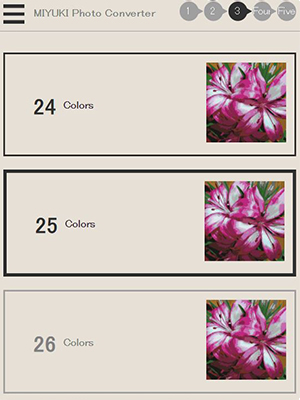
STEP TWO
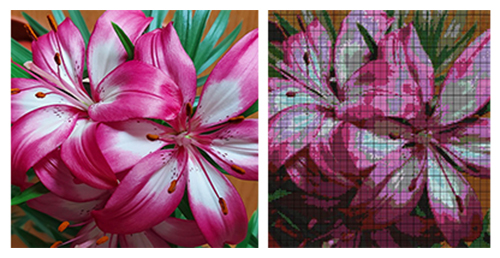
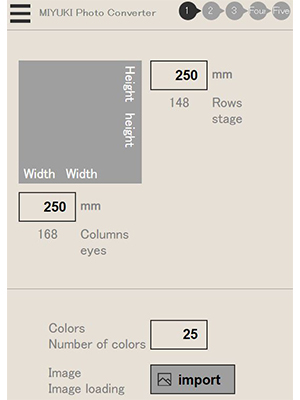
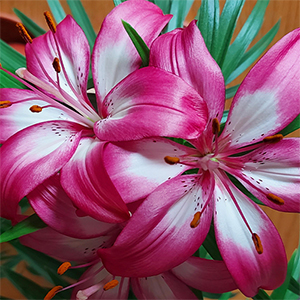
Upload the image you wish to use. Here is where you'll choose how big you want your finished design to be and how many colours you want to use (you can change this later on too). You'll then upload a photo or an image (but do remember to check copyright if you don't own the image!) We chose our chart to be 250mm x 250mm, with 25 colours, then uploaded a picture of one of our teams' pretty lilies. |
|
|
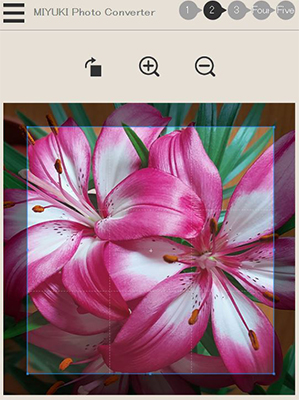
STEP THREE
Crop the area you want to work with. You can pick which part of the image you want to use, as well as enlarge, reduce or rotate the image you've chosen. You can see on the image where the crop box appears, and for our example we decided not to crop any of the flowers out. You simply move your mouse over the edges of the crop box, then click and drag to resize the cropped area. You also have the option to enlarge, reduce or rotate your image too. |
|
STEP FOUR
Readjust the colours of beads used. You'll be shown a preview of your pictorial chart and you can check it looks as you want it to. You can change the number of colours you've chosen to use if you wish too. Miyuki recommends that for landscapes it is better to go with a higher number of bead colours, whereas illustrations work better with a smaller number of bead colours. |
|
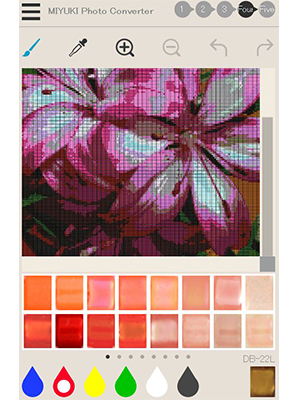
STEP FIVE
Edit the converted design. You can also choose to edit some of the colours in your image if you wish, by using the icons above the image and the colour palette below the image: The Brush - Draw on your image with the selected colour in the palette. The Eyedropper - Extract the clicked on colour in your image e.g. if you want to replicate this colour somewhere on your image. Enlarge - Enlarge the image. Reduce - Reduce the image. Back - Undo your change by one step. Re-execute - Re-do the change you have just undone. The colour palette can be used as follows: Coloured Squares - These represent the bead colours. Click on them to use them to draw on your image. Swipe the screen or tap the dot at the bottom to display the next colour palette in the range. When you pick a colour, the colour code of the bead is also shown. Drop Icon - This is a "colour palette" that shows beads of similar colours. 6 palettes from blue to black are available to pick from. |
|
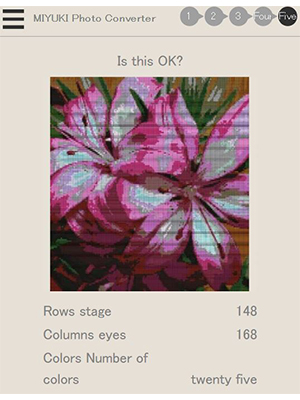
STEP SIX
Check preview and save work data. Here is where you can do any final checks and amendments before completing the design. You'll be shown the final pictorial chart, the number of rows and columns, and the number of colours chosen. You can use the "back arrow" in the bottom left-hand corner of the screen to go back and make any further adjustments. |
|
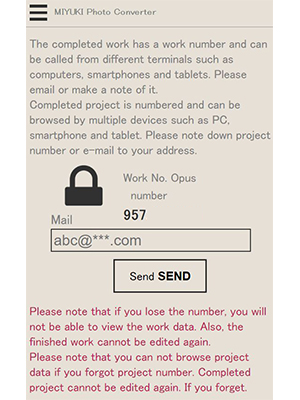
When you click on "OK", you'll given a prompt to remind you that your work will be given a number that can be used to recall your design from any device. You'll need to click on the blue "OK" box to continue. |
|

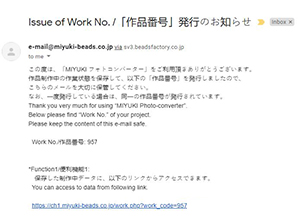
You'll then be shown a reference number for your design, so be sure to record this somewhere safe if you want to be able to revisit it again and again. You also have the option to put in an email address where the project number can be email to you for future use. |
|
|
When you back on the main page, you can enter your design's reference number under "Works" and click "ADD" to add it to your gallery. From here you can always access your work again, provided you use the same device you originally created the design from. |
|
And there we go - you should now have a bead pattern to turn your images or photos into beautiful beadwork.
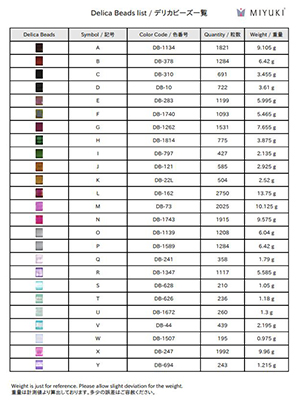
You can also download and save your design as a PDF for future use. When you scroll down towards the end of your PDF, you'll find the Delica bead list. This shows the the code assigned to each bead in your word chart, the Delica bead Miyuki colour code, the quantity and weight required for each bead colour. |
|
We'd suggest having a play around with the Miyuki Photo Converter tool before committing to a final design, as there are certainly lots of different ways to adjust your original image into something extraordinary!
Show me the Miyuki Photo Converter tool