
?
|
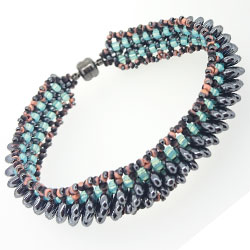
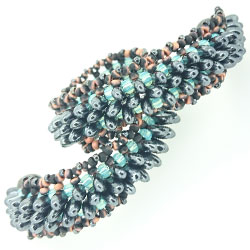
| Right-O Rizo Bracelet Pattern by Damaris Ramenaden |
Shop here for your beads and findings:
| Size 12 Needle |
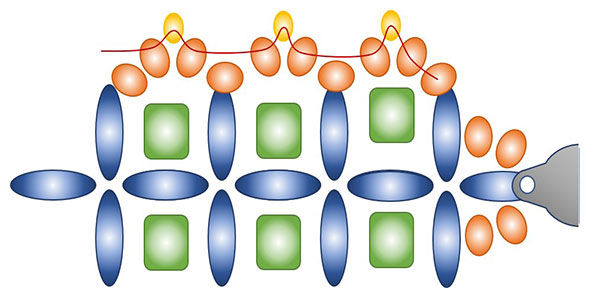
The Right-O Rizo Bracelet is comprised of Right Angle Weave (RAW) Rizos, with 8/0 seed beads, 11/0 Miyuki Unions and 15/0 seed beads as side embellishments.
When making this bracelet, some useful points to note are:
- Ensure your tension is medium to tight, as this helps the Rizos to stand upright and keep the design supply and not floppy
- Condition your thread to help protect it and help the stitching tension be firmer
- Check all the Rizos point in the same way before stitching the next unit of RAW. You may find it easier to stitch them so they hang down (so you are working upside down), as gravity will help the Rizos orient themselves in the right direction
- When working out the length of your bracelet, remember to take into account the length of your clasp. Remember also that as you work the side embellishments, the Rizo units will become tighter
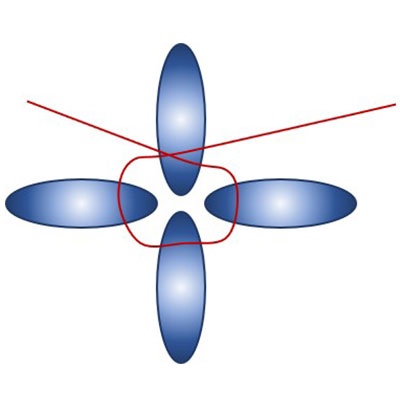
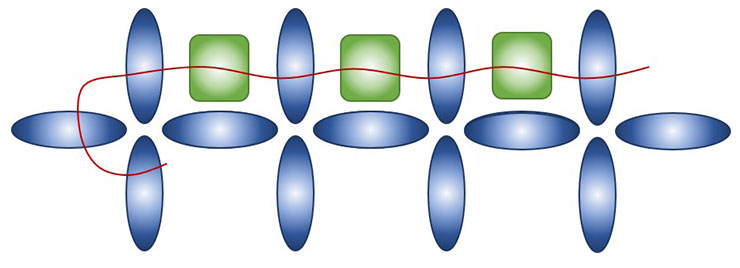
| Step One Begin with a comfortable length of thread. You can leave the thread on the reel/bobbin if you wish, so once the working thread has been used you can continue with the tail thread. Pick up 4 x Rizos then pass back through teh first, second and third Rizo to make a circle, making sure all the Rizos are pointing the same way. |
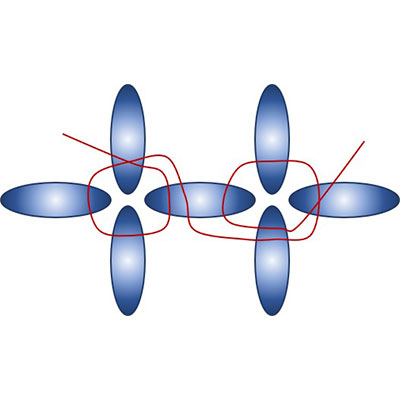
| Step Two Pick up 3 x Rizos and pass back through the Rizo you were coming out of in the previous step. This will create a second circle. Weave through the next two Rizos, ready to stitch the next unit of RAW. Continue stitching units of RAW until your bracelet is the desired length (remember to take into account the length of your clasp when working this out). Make sure that in each unit the Rizo beads are all pointing the same way as you won't be bale to rectify this later. |
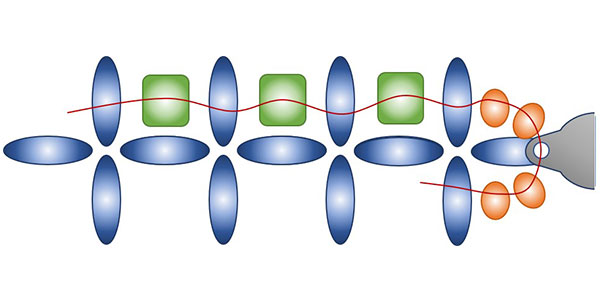
| Step Three Once you have stitched the RAW Rizos, it is now time to add in the 8/0 seed bead embellishments. It is a good idea to double check the bracelet length again at this stage, as you can easily add in or remove units of RAW before starting the embellishments. Making sure you exit from one of the side Rizos in the end unit of RAW, pick up 1 x 8/0 seed bead and pass through the next side Rizo in the next unit of RAW. Continue adding in 1 x 8/0 seed bead in between each side Rizo, until you reach the end of the first side of your bracelet. You should notice that as you add in the 8/0 seed beads, the bracelet will start to curve slightly, to fit your wrist better. |
| Step Four Once you have reached one end of the bracelet, it is time to add the clasp. Making sure you are exiting from the top most Rizo in the last unit of RAW, pick up 2 x 11/0 Miyuki Unions, your clasp, followed by 2 x Miyuki Unions. Pass back through the Rizo again, then reinforce this thread path a couple of times, before weaving down the start the 8/0 seed bead embellishment down the other side of the bracelet. Once you have embellished the other side of the bracelet, add in the second hand clasp in the same way as above. Once the clasps have been added, weave through the exit the first 8/0 seed bead, ready to add the next side embellishments. |
| Step Five The next side embellishments are created using 11/0 Miyuki Unions. Exiting from the first 8/0 seed bead, pick up 4 x Miyuki Unions and pass back through the 8/0 (effectively creating a unit of RAW off the side of the 8/0 seed bead). Weave through the next Rizo and 8/0 seed bead , ready to add the next RAW unit of Miyuki Unions. |
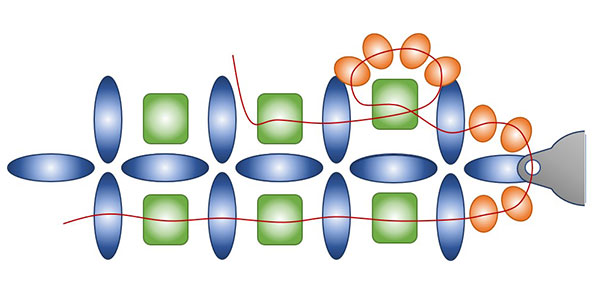
| Step Six Pick up 3 x Miyuki Unions and pass back through the last 11/0 Miyuki Union added in the previous RAW unit, the 8/0 seed bead, the Rizo bead and the next 8/0 seed bead. Continue adding RAW units of 11/0 Miyuki Unions down the length of your bracelet. When you get to the end, weave through your beads to the 8/0 seed bead on the other side, and repeat Step Five and Six to add RAW units of Miyuki unions down the other side. |
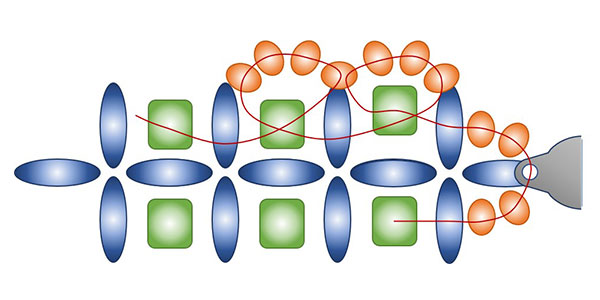
| Step Seven For the final embellishment, weave through to the first RAW unit of 11/0 Miyuki Unions on one side. Weave through the first two 11/0 Miyuki Unions, so you can exiting from the middle of the unit. You will only be using the middle two 11/0 Miyuki Unions for this embellishment. Pick up 1 x 15/0 seed bead and pass through the next 11/0 Miyuki Union, then the first of the two middle 11/0 Miyuki Unions of the next unit. Pick up another 15/0 seed bead and continue adding them in the same way, splitting up the two middle 11/0 Miyuki Unions and connecting them to the next unit. Once you have worked your way around both edges of the bracelet, weave through and secure the thread, then trim. Secure and trim any tail threads that may be left. |
And now your bracelet is ready to wear! Woo hoo!