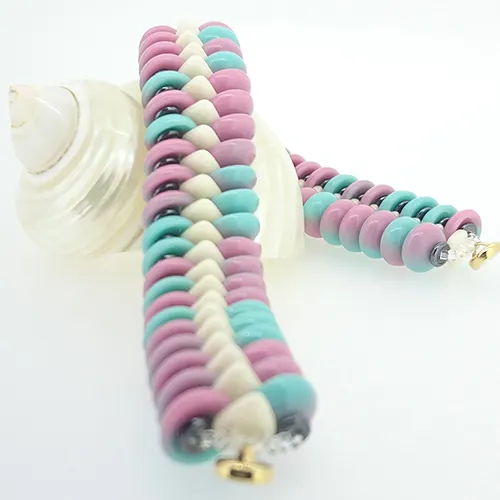
| Slinky Piggy Bracelet Designed by Damaris Ramenaden |
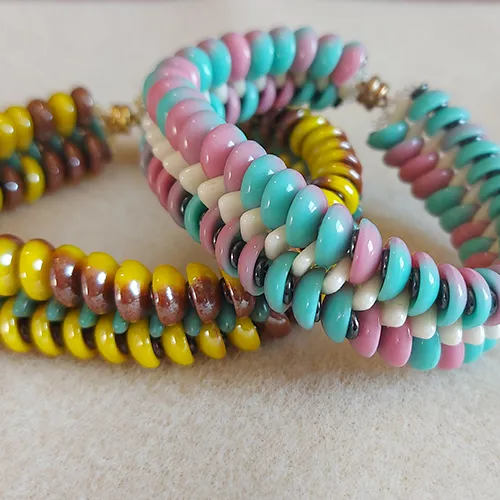
Piggy beads and two hole triangles come together to form a close fitting, textural slinky bracelet.
Shop here for your beads and findings:
| 80 x Piggy Beads | Magnetic Clasp |
| 41 x Czechmates 2-Hole Triangles | Beading Needle |
| 82 x O-Beads | Beading Thread |
| 20 x 15/0 Seed Beads | Bead Reamer |
Top Tips:
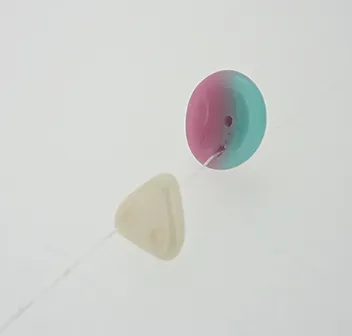
As Piggy beads are domed, to make it clear these instructions will refer to the outside of the Piggy bead (meaning the ‘hill’ domed side) or the inside of the piggy bead (meaning the ‘valley’ domed side) when describing which side of the piggy bead to stitch through.
As Piggy beads have two holes (one in the centre and one towards the edge) these instructions will use these definitions when describing which hole to stitch through.
Check all the holes are clear in your two-hole piggy beads and two-hole triangles before using them. Have a bead reamer handy in case you find some of the bead holes blocked. Work slowly and carefully to avoid shattering the bead itself.
Make sure you are stitching through the correct holes when working with the two-hole triangles, to ensure they all face the same way. The instructions will state to either the left hole or the right hole.
Help maintain tension when working by using your tail thread to pull the bracelet together if it becomes loose whilst working.
If you choose to use magnetic clasps, when taking the bracelet on and off slide them apart where possible to avoid over pulling and ultimately stretching the thread. If you cannot slide them apart, try to split them slightly with your nail before pulling them apart.
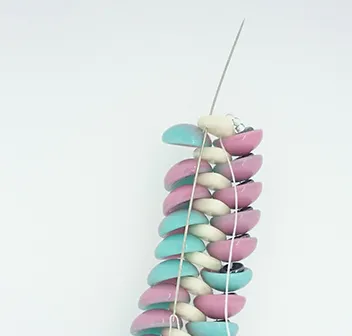
| Start with 2m of conditioned thread and put a stop bead 20cm from the end of your thread. Pick up 1 x two-hole triangle and pass your thread through the left-hand hole. Pick up 1 x Piggy bead and pass through the edge hole on the inside of the Piggy bead. Continue stitching one two-hole triangle (left-hand hole each time) and 1 x Piggy bead (edge hole on the inside of the bead) until you have reached your desired bracelet length (minus 1cm for the clasp. For a bracelet measuring 17cm in total you will need to have used 41 two-hole triangles and 40 Piggy beads so far). Making sure the last bead you have strung is a two-hole triangle, pass your thread through the right-hand hole of this triangle, so you are now stitching the opposite way, on the other side. |
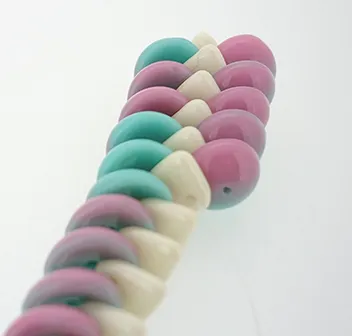
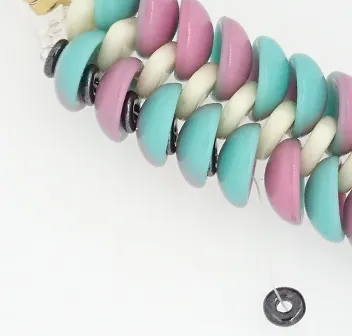
| Add 1 x Piggy bead by threading through the edge hole on the inside, then pass through the right-hand hole of the next two-hole triangle. You should notice this Piggy bead faces the opposite way to the Piggy bead on the other side. Continue adding 1 x Piggy bead in the same way in between each triangle for the length of the bracelet.
Make sure you exit from the right-hand side hole of the last triangle in your bracelet. You should now have a Piggy bead in between each triangle on both sides – note the Piggies should all be facing one direction on one side, and the other direction on the opposite side. |
| Pick up 2 x 15° seed beads, the magnetic clasp, then 2 x 15° seed beads, then pass through the left-hand hole on the two-hole triangle. Your thread should now be coming out behind the two-hole triangle at the end of your bracelet. Pass back up through the right-hand hole of your two-hole triangle. Weave through the 2 x 15° seed beads, the magnetic clasp and the other 2 x 15° seed beads. Pass down through the left-hand hole of the two-hole triangle and back up through the right-hand hole of the same two-hole triangle.
Repeat again to reinforce the clasp loop a third time.
Now pass through the first 15° seed bead you added in step 8, then pick up a further 3 x 15°seed beads, and an O-bead. Pass through the outside centre hole of the Piggy bead on the side of your bracelet, ready to work your way down. |
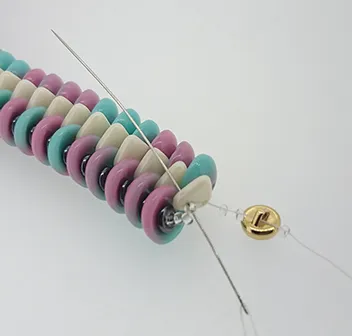
| Thread 1 x O-bead, then pass through the centre hole of the next Piggy bead in the row. Repeat with 1 x O-bead in between each Piggy bead. You should exit from centre hole in the last Piggy bead in the bracelet length. Go careful when you add the O-beads, as they can shatter if you force them between each Piggy bead. |
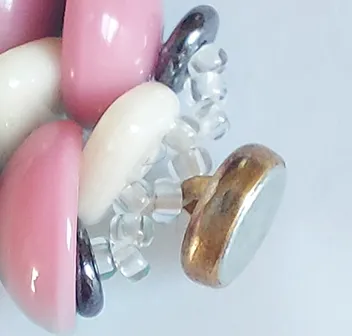
| Pick up 1 x O-bead and 4 x 15° seed beads, and pass down through the right-hand hole of the two-hole triangle bead. Pass back up the left-hand hole of the two-hole triangle. Pick up 2 x 15° seed beads, the magnetic clasp, then 1 x 15° seed beads. Pass down the last 15° seed bead added in step 13 and through the right-hand hole on the two-hole triangle. Now pass back up through the left-hand hole of the same two-hole triangle. |
| Weave through the 2 x 15° seed beads, the magnetic clasp and the other 2 x 15° seed beads. Pass down through the right-hand hole of the two-hole triangle and back up through the left-hand hole of the same two-hole triangle. |
| Now pass through the first 15° seed bead you added previously, then pick up a further 3 x 15°seed beads, and an O-bead. Pass through the outside centre hole of the Piggy bead on the second side of your bracelet, ready to work your way down. Thread 1 x O-bead, then pass through the centre hole of the next Piggy bead in the row. Repeat with 1 x O-bead in between each Piggy bead. You should exit from centre hole in the last Piggy bead in the bracelet length. Remove the stop bead you added at the start, then thread 1 x O-bead and 3 x 15°seed beads. Pass through the first 15° seed bead added previously and down through the left-hand hole of the two-hole triangle.
Pass up through the right-hand hole of the two-hole triangle and through the 4 x 15° seed beads, the O-bead and the centre hole of the Piggy bead. |
| Weave through a few beads and tie a discreet knot (this is best placed between Piggy beads if possible, to keep the knot hidden. Weave through a few more beads then trim the working thread neatly.
Put a needle on your tail thread, weave through the 4 x 15° seed beads, the O-bead and the centre hole of the Piggy bead. Weave through a few more bead then secure with a knot. Weave through a few more beads and trim neatly. |